How to activate free SSL encryption?
If you are activating SSL on to your WordPress site read tutorial here: https://www.shellit.org/kb/ssl-aktivointi-wordpress-sivulle/
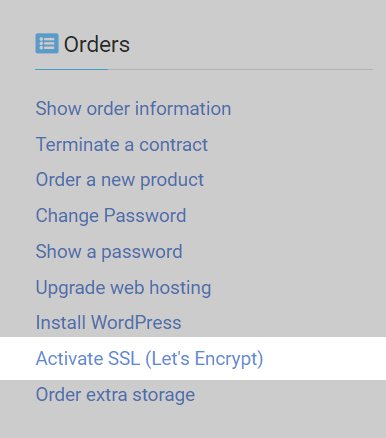
1. Select Activate SSL (Let’s Encrypt) from admin panel front page.
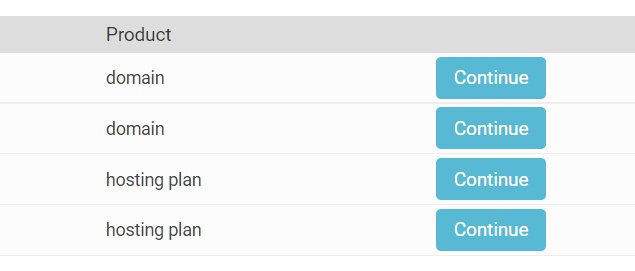
2. Select your domain from the list and click Continue.
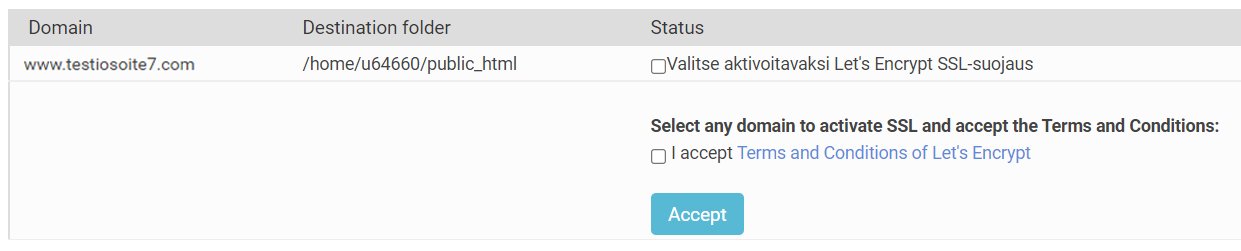
3. Select all subdomains that you want to activate encryption for. You can choose multiple subdomains. You can also add SSL encryption to subdomains afterwards.
You can check encryption few minutes after activation by visiting the site with https:// in front of the address. E.g https://www.shellit.org. Confirmation might look a little different depending on browser you choose to use. Google Chrome shows green lock symbol when everything is ok.

By default SSL isn’t forced on the site and users can use both http and https sites as they want. If you want to force users to use only SSL encrypted pages you can do it by creating .htaccess file where you setup use of SSL encrypted site only.
Creating .htaccess file
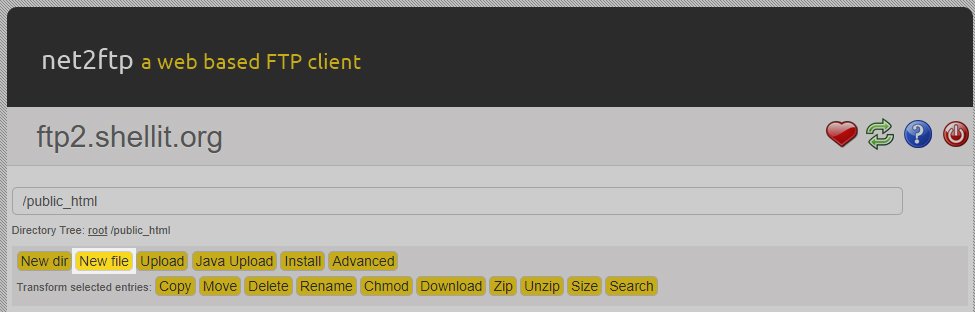
1. Log in to webftp and select public_html.
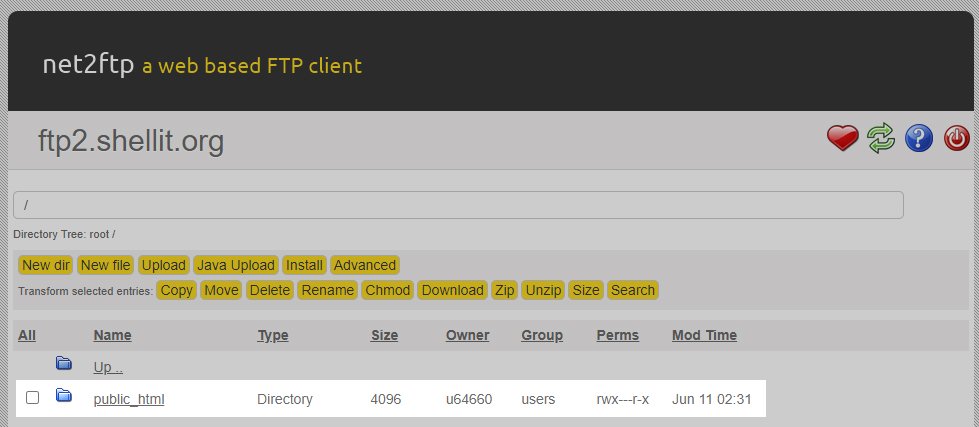
2. Click New file button.
3. Give file a name .htaccess
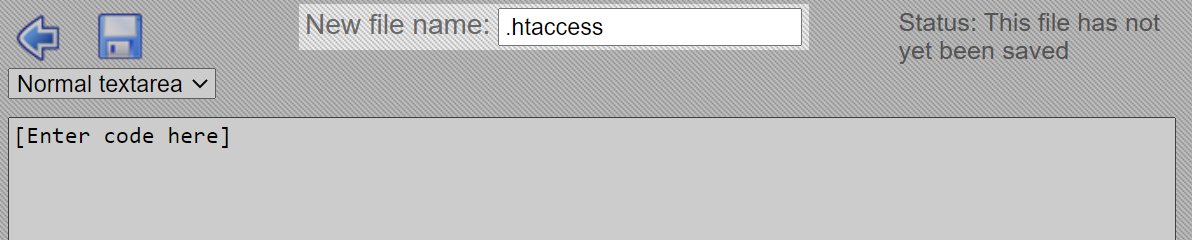
4. Paste this code in to the text field. RewriteEngine On
RewriteCond %{HTTPS} off
RewriteRule ^(.*)$ https://%{HTTP_HOST}%{REQUEST_URI} [L,R=301]

5. Click “Save” icon on top left of the page.
6. All done!
In some cases you might get “mixed content” error. Then we recommend to contact your site creator because fixing that can be quite tricky. Error might happen because there is some image or other file that still uses http address. SSL encryption needs all content to use https.
You can also contact us to do SSL activation to your page. Please check our additional services price list for a reference prize.